• Work
  • About
  • Contact
  • Blog
  • Announcements
  • Shop!

Jessie Makes Stuff

  • Work
  • About
  • Contact
  • Blog
  • Announcements
  • Shop!

How To: Customize Your Own Display Case

I have a couple upcoming craft shows this holiday season, and since I’m displaying some new items - like my Fridge Therapy post cards - I wanted to add some new ways to show them off on my table. As much as I like rifling through stacks of prints to see what’s there, I also know sometimes I get bored and lose interested if there’s too many items to go through. So I thought for my cards it would be a good idea to display them so they can be seen at a glance. Of course, not all my prints will fit in here, but that leaves only a handful left to rifle through. Or, more likely, I’ll display them flat on the table right in front of the box.

Anyway, if anyone is interested in some easy ways to customize your own display cases, look no further! I don’t always have the time or where-with-all to build something from scratch, but there are so many stores that sell things ready-made that can be easily modified. Like these shadow display boxes, for example. I got them from Home Goods, for a moderate price. They’re already assembled, with the display clips mounted. I could have used them as is, but where’s the fun in that?

1_IMG_7666.jpg

First, I wanted to make it more personalized, so I removed the clips and painted the back my signature teal with glitter. I figured the white postcards would really pop against the color, and most of my artwork has that color as a base so it would all tie together nicely. Make sure you use painter’s tape around the edges if you’re trying to keep the original color in tact. I wish I had thicker tape on hand, because I still managed to paint above it in a few spots and then had to paint over those in white.

2_IMG_7667.jpg
3_IMG_7669.jpg

Once my base color was dried, I added a glitter layer. And once that was completely dry, I added a satin gloss varnish that I usually use to seal my paintings. One note specifically for the boxes I bought - these were unfinished wood and I got so many effing splinters I can’t tell you. The roughened edges are an effect for sure, but I really regret not just sanding the whole thing, even quickly. But I didn’t want to have to paint the whole thing either, so I’m living with the consequences. I thought the varnish would help it a bit, but it wasn’t thick enough to make a significant impact.

Anyway, once all the top coat dried, it was time to reapply the clips. I just hand screwed the screws back through the holes before putting the clips themselves on because I’d clogged a few with paint. They were short screws, so it wasn’t too much effort taking them out to put them back in. Worth the extra step.

4_IMG_7726.jpg

And finally, I bought a set of hinges from Home Depot so I could affix the boxes to one another. My thinking was twofold. First I’d have one complete display box I could also maybe use for storage purposes and secondly I’m hoping the hinge helps the boxes support each other while they’re standing. I was a bit concerned they would tip over with how light they are, but now that they’re fastened together they’re much steadier.

5_IMG_7737.jpg
6_IMG_7739.jpg

And there you have it! Hope this inspires you to get creative with your display cases, or even when decorating your home. It’s so easy to modify something to suit your own tastes. Even if you don’t have time to fully customize what you want, a quick coat of paint can make all the difference in the world!

7_IMG_7742.jpg
tags: DIY, how to, display, decoration, modification, custom, paint, crafts, personalized
categories: blog, DIY, decoration, how to, inspiration, stickers
Wednesday 11.21.18
Posted by Jessica Parker
 

Pumpkin Carving

Once the summer ended, and even though I was stuck indoors more often than not, I didn’t have much inspiration to create. That is, until October rolled around and I started generating ideas for jack o’lanterns!

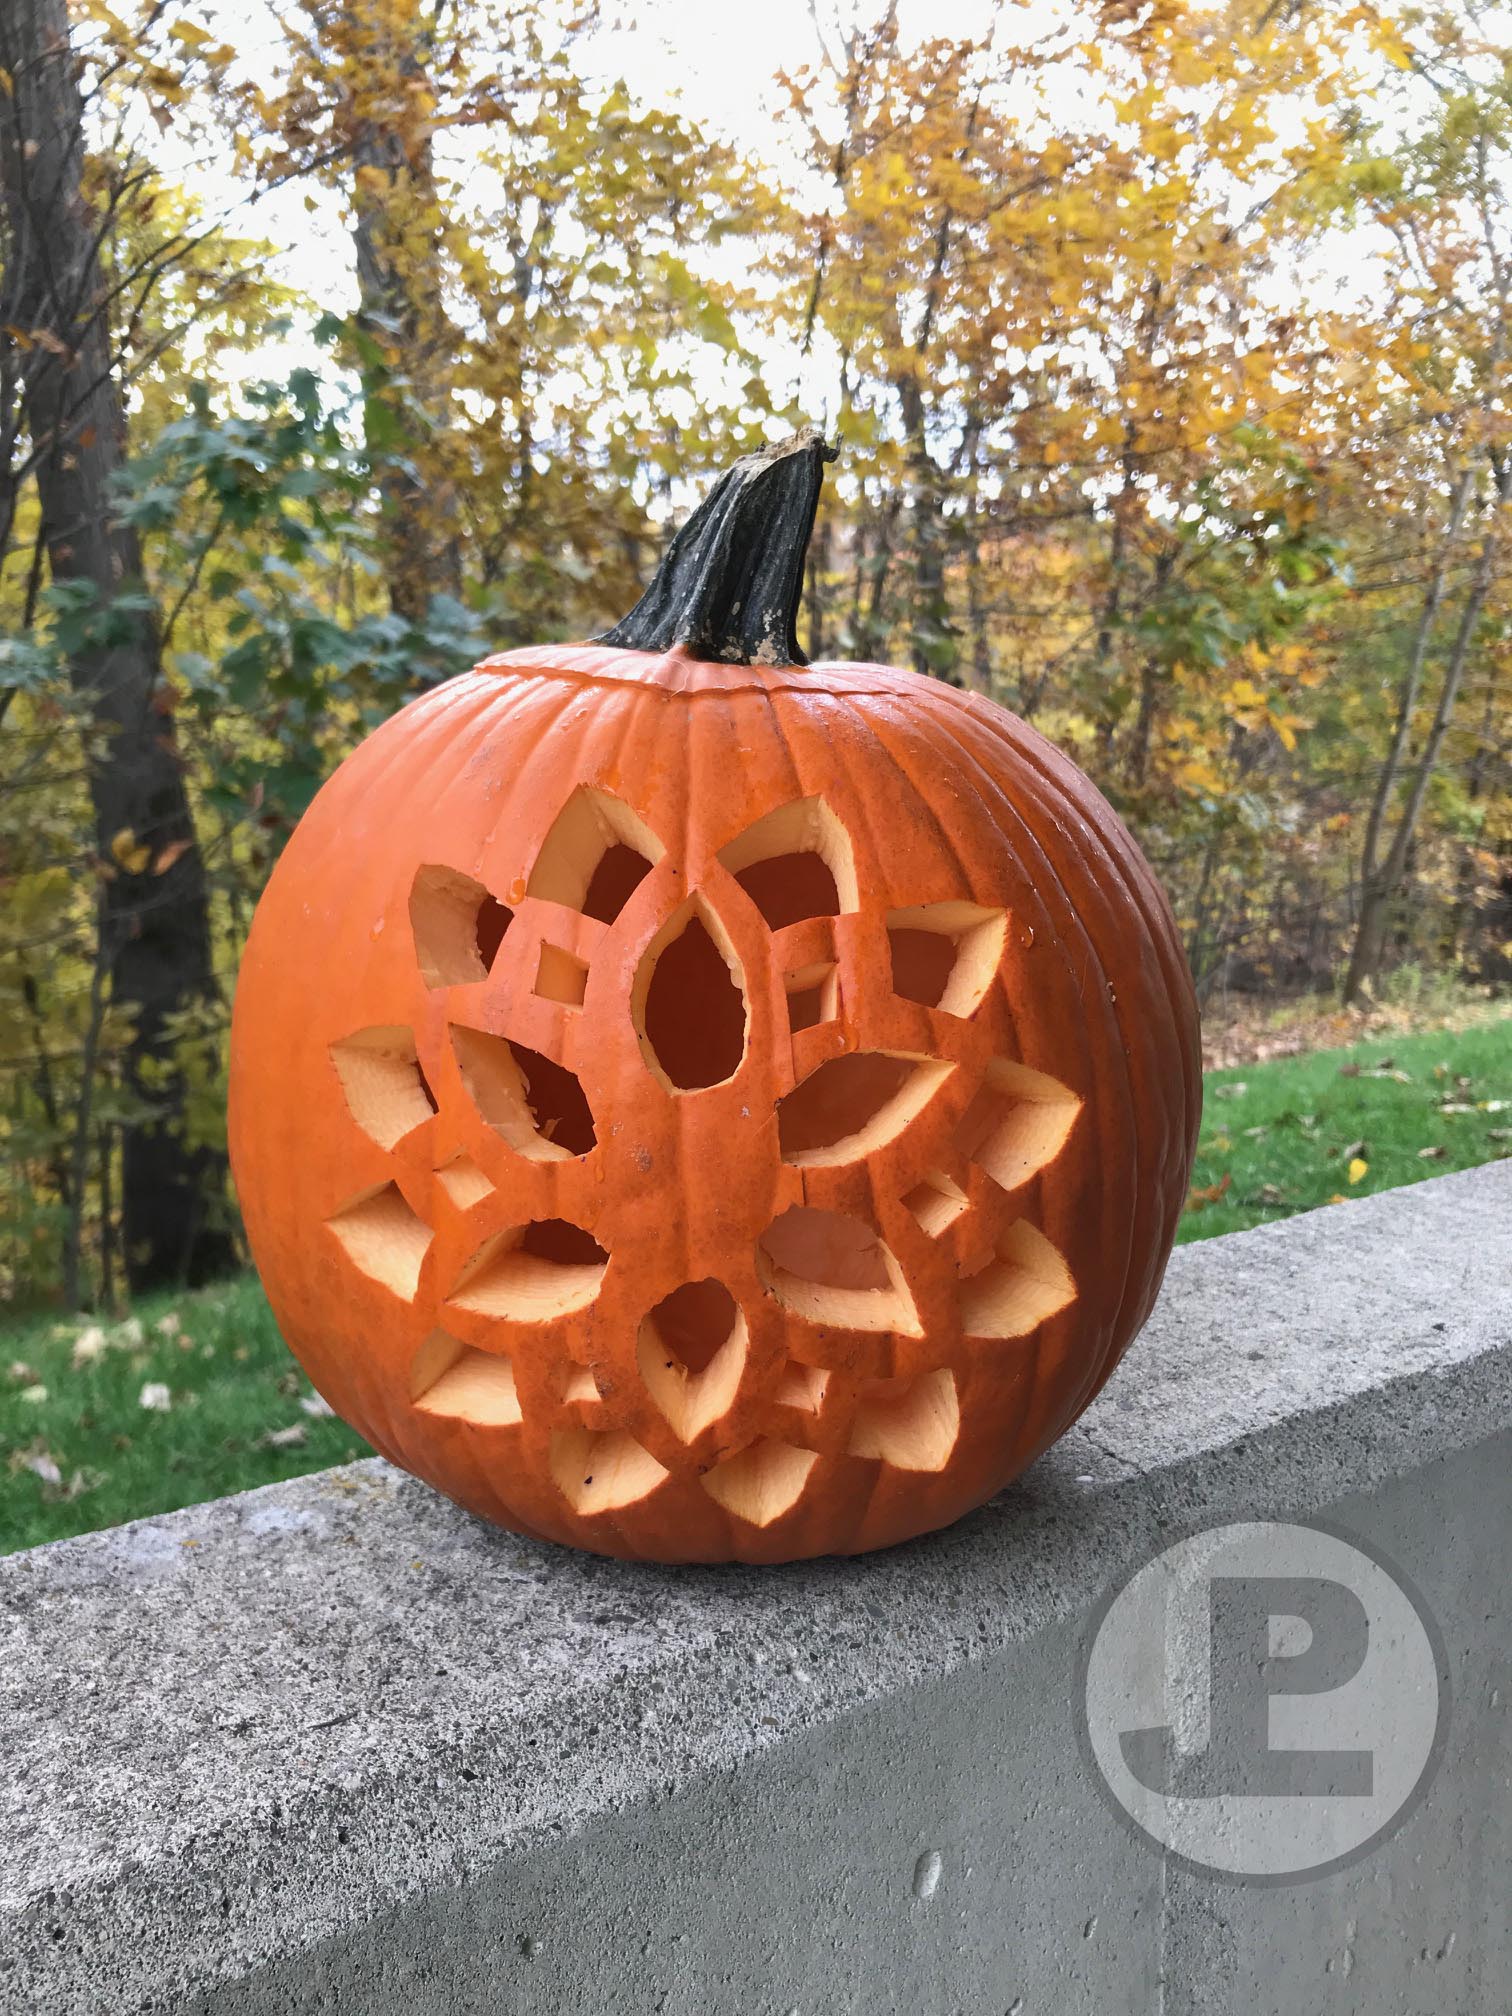
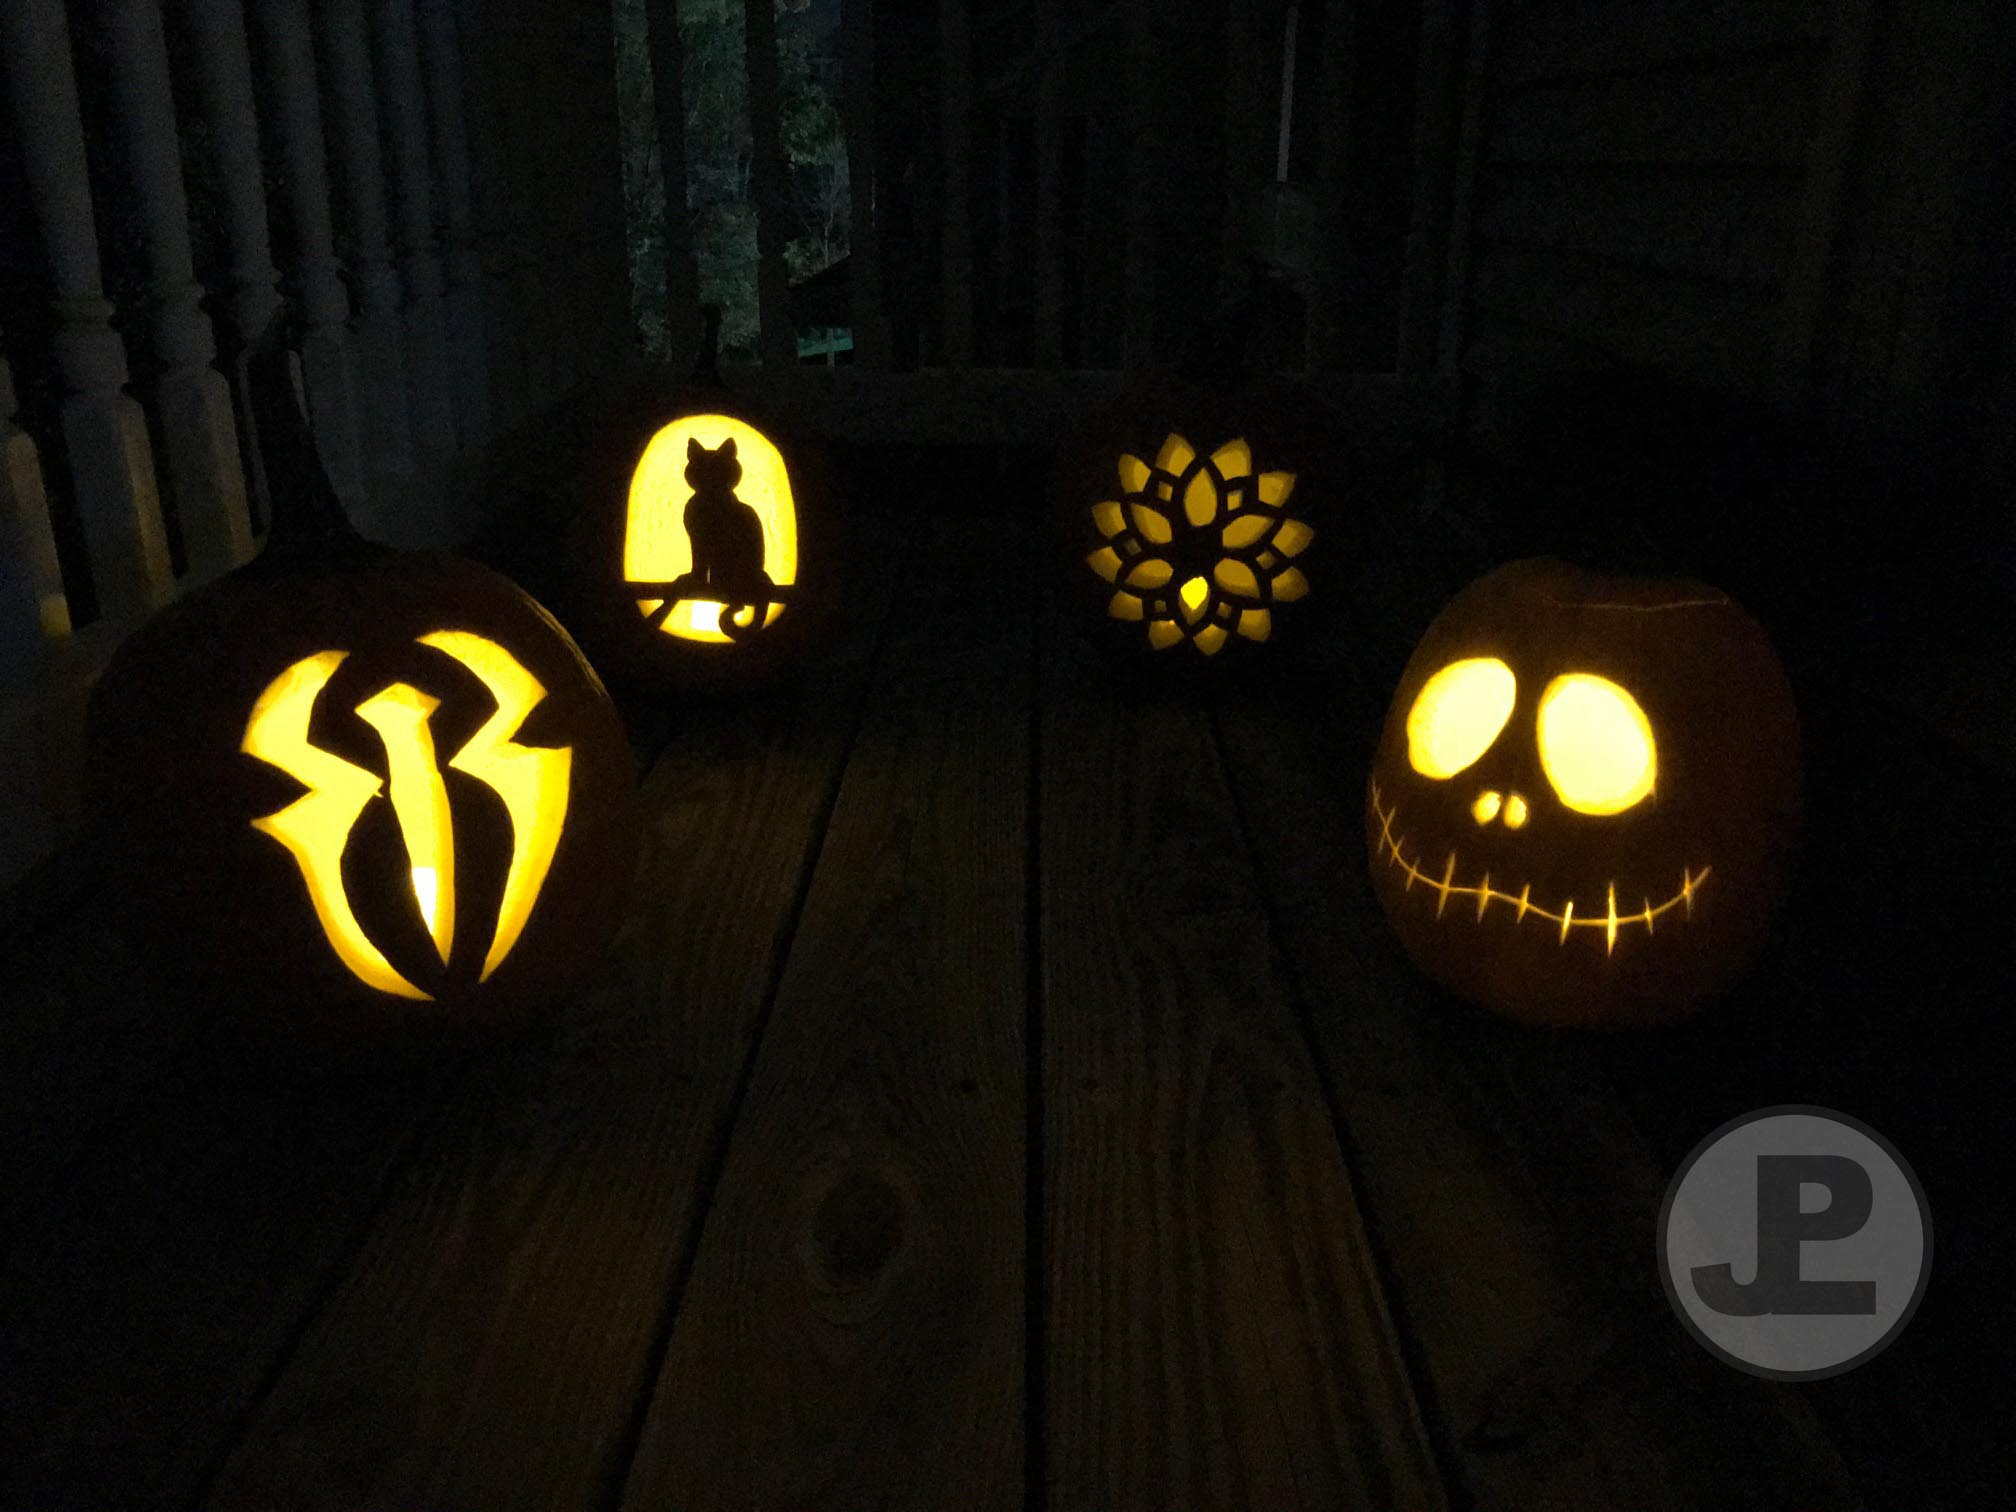
I wanted to do some repeats of ideas I’d enjoyed making previous years, like the cat on a branch and Jack Skellington, but I also had some fun new ideas I wanted to try, like a mandala.

IMG_7387_Cat.jpg
IMG_7389_Jack.jpg
IMG_7385_Mandala.jpg

And even though I still had two more that I’d been waiting to carve, because they were more intricate, I made a last-minute addition. Roman Reigns, a WWE wrestler, announced he’s taking a leave of absence as he battles leukemia. It broke my heart to hear the news, so I went and bought a 6th pumpkin (the other 4 had already been designed out weeks earlier), and created one in his honor.

IMG_7386_Roman.jpg
Roman, Jack, Mandala, Cat.jpg

Finally, the complicated, way more detailed ideas, like doing The Phenomenal One, AJ Styles’ logo. (He’s my favorite WWE wrestler. I even dressed as him for Halloween last year.) And attempting to do Stitch from Lilo and Stitch. These two required a bit more technique than the others, but I was excited to see what I was capable of. I started with AJ’s logo, scraping the logo away in relief rather than carving straight through the pumpkin. (Though I did carve out the stars). Once I was done, I scraped away the inside of the pumpkin to make the walls thin enough for the light to shine through.

IMG_7388_Styles Day.jpg
IMG_7325_styles.jpg

I used the same method for Stitch, it just required a lot more work since there were so many small details. Instead of using a vegetable peeler, as I’d anticipated, I ended up using a citrus knife to peel and chisel away the skin. It worked, but I’ll definitely look into investing in some different tools next year. Maybe a scalpel, as someone suggested. X-D

IMG_7390_Stitch day.jpg
IMG_7360_stitch.jpg
IMG_7401_All Dark.jpg

Hope you all enjoyed your Halloweens as well. If you carved any pumpkins, I’d love to see them! In the meantime, enjoy this picture of a girl who enjoys smushing her hands into pumpkin guts as much as I do.

Surprise, it’s me. I have apparently always loved smushing my hands into pumpkin guts :-D

Surprise, it’s me. I have apparently always loved smushing my hands into pumpkin guts :-D

tags: pumpkin, pumpkin carving, cat, halloween, holiday, roman reigns, aj styles, wwe, phenomenal one, stitch, mandala, handmade, decoration
categories: crafts, decoration, blog
Monday 11.05.18
Posted by Jessica Parker
 

Community Uplift Project

Hello everyone!

You ever get an idea in your head and it won't go away until you start working on it? That happened to me over the past couple of months, and then once I finally caved and got to work on it, all these other ideas started snowballing until I was left with something that has morphed and changed into this giant igloo I wasn't even planning on building in the first place, but now that it's here I can't even believe it started with just one tiny snowflake of inspiration. And I can't ignore it.

As some of you may know, I started to get serious about my lettering skills over the past few months, and beyond learning how to make my writing more legible, I've been inspired in other ways I couldn't imagine. Beyond the pretty, stylized pictures I'd see throughout my Instagram community were real people I'd never met, as is the way with the internet, who were cheering me on and offering their support. Incredible teachers and mentors, and even just other people like me who wanted to learn were offering suggestions about how to draw certain lines more easily, or what pens work better on what kind of paper, and patiently answering my questions about techniques that were foreign to me. (Things like creating galaxies out of watercolor.)

I didn't have to feel silly or dumb about not knowing things, because we were all learning together. (Also because it's not silly or dumb to not know things in general. We have things we didn't know before we knew them. Like did you know that "kill" means "creek" in Dutch? That's why there are so many towns in New York with "kill" in the name. In Ireland, however, kill or "cil" means "church of." You're welcome.)

My virtual community became a real community, just like the one I drive around in and shop in and add my little butterfly-effect of ripples in ever time I leave my home. I've always been a community-oriented person - I like having my regular haunts where people know me by name, or I can order my usual, or just check in with the people I may only get to see during those visits. I like to feel like I matter and my presence makes a difference, who doesn't? But the thing is, I didn't always feel that way in every aspect of my life - I had to learn it. And I'm still learning it!

You know what goes a long way towards reminding me that I am an important part of my community? Pretty, whimsical, and maybe even silly messages. I remember seeing a tweet last year that was basically a girl recounting her fear of failing a test or something, and that her father said if she was able to believe in Santa Clause for 10 years, she can believe in herself for 5 minutes. I can't even tell you how that stuck with me. I'd think of it often - and giggle each time at the silliness of it. But it's true, right? How easy it is to believe in something else, even something with a questionable basis of existence, but we don't always put that same faith in ourselves. That girl's tweet really put things in perspective for me. And I wanted to create my own version of it, something that spoke more to me personally, which is where my artwork that says, "If I can Believe in Unicorns, I can Believe in Myself" came from.

IMG_1162_Unicorns_8x10.jpg

And you know what? As I've been discovering with my artwork all along, when something resonates with me, there's a good chance it resonates with other people, too - just like that girl's message. There are so many things I've learned as an adult that I wish I'd known as a kid, or maybe even wished that I'd heard it in a way that just didn't make me roll my eyes at the cliche-ness of it. It's hard to believe some one-size-fits-all messaging that I've seen, even as an adult. But I thought maybe part of my special skill-set is that I can put a new perspective on these to make them more digestible. And what if I could make them more accessible to people who really need to hear them, but may not otherwise be the target audience for my artwork?

So, finally, the reason you're all reading this post... My idea for a Community Uplift Project!

IMG_5945_JLP.jpg

The idea is to take my artwork and make it accessible, both in pricing and the delivery system/medium, for people who need it. And, in my opinion, the people who need it most are kids! Did you know that most of our beliefs are ingrained in us before the age of 5? That's why it's so much harder to change them as we grow up, because chances are we've been continuously hearing these same messages our whole lives with nothing to counteract them. (Some are positive, and that's wonderful! But many aren't.)

So, my idea is to expose children (of all ages) to some new, hopefully more positive messages, and give them something to mull over and try on that maybe they haven't been presented with before. Things like telling children they are allowed to make mistakes, because of course we learn more from our mistakes than doing things perfectly the first time around. A child may hear that mistakes are okay, but if they see their parents upset over an imperfection or mess-up, the intended message may not be the one that's absorbed. And maybe they also need to hear that if something is important to them, that it's important, period, and they don't have to minimize their interest or feelings because someone else maybe has different priorities. And everyone should know that if they can believe in unicorns they can believe in themselves, because I want to encourage everyone to believe in themselves as much as they believe in sparkly, magical, majestic, mythical creatures. (I want you all reading this to know this, too, that you are each sparkly, magical and majestic in your own right.)

IMG_6121_JLP.jpg

The first step, for me, is to spread awareness on this community project in general. Not only am I sharing this with all of you, but I have been handing out some of these postcards around town and hiding some in places where people can find them and hopefully gain some personal insight or even just enjoy the excitement at finding something hidden. Maybe you want to do the same in your community, I'd love that!

The second step is to get these into schools. I have a vision of teenagers opening their lockers on the first day of school to see a message waiting just for them. I believe it would be meaningful for them, to feel seen and like their individual presence makes a difference. Like their school or community cares enough to provide these well-wishes to them on their first day, and that everyone is rooting for them. So as part of my personal community uplift project, I've reached out to my local school district to offer them a donation for their high-schoolers, as well as options for getting these to the middle-schoolers and even elementary-schoolers. Ideally I'd like to offer this to multiple schools in my area for low or no cost, so I'm working on finding other ways to source funding for this.

The third step is to spread this sense of uplift beyond just my community and into areas around the country and possibly around the world! Do you have children who could use an infusion of positivity in their lives? Know any teachers who may want to give their students gifts of empowerment on the first day of school, or administrators who may want to hang these messages in their halls or classrooms? My hope is that you can help me spread this idea wherever you are so we can reach even more people .

In my shop, you'll find sets of postcards and posters for sale, each set with a variety of messages like these ones pictured, as well as all the future messages I'll create from the ever-growing list of ideas I have. Maybe you want to buy sets of these to leave around town or donate to your school personally, or fund-raise with some neighbors to make it a community effort. I will gladly work with you to keep costs reasonable so you can reach more people at a time. (The more you buy, the lower the cost per piece.) The backs are blank, so you can add your own personalized message if you're so inclined. Or if your school wants to sponsor these directly, I can include a message from them on the back, reinforcing their encouragement to the students. (I can even create a custom design if the school has their own motto or mantra they'd like to incorporate.)

No matter our age, we all deserve to be taught to love, trust, and believe in ourselves. All I ask is that you please help me spread the love, even if it's just a millimeter at a time.

tags: community, inspire, positivity, hope, children, school, back to school, messaging, share, uplifting, empowering, poster, postcards, unicorns, mermaids, believe, faith, education, emotions, feelings, emotional education
categories: blog, custom, decoration, gift ideas, inspiration, empowering, community
Friday 07.27.18
Posted by Jessica Parker
 

In a galaxy... not too far away

One of my favorite things to do these days is paint galaxies. Not sure what I'm talking about? Check out the artwork that inspired me, by one of my favorite artists on Instagram, Jen Aranyi.

I had all the tools on hand, so once I decided I wanted to make one myself, it was just a matter of doing it. After lots of trial and error, I've gotten the hang of it a bit more, and love messing around with different color combos. I thought I'd give you a quick photo tutorial in case you're interested in trying as well!

You'll need:

  • Watercolor paints - I used these Mermaid Markers from Jane Davenport
  • Watercolor paper (I cut some Strathmore 11" x 15" sheets in quarters)
  • Water
  • Brushes - bigger is easier for this
  • 1/2 - 1" Washi or painter's tape. (I find the painter's tape holds better when I add water, but peels without ripping the paper when I'm ready to remove the borders)

I start off by taping my paper to whatever surface I'm using (in this case, a marble cheeseboard I got from Home Goods), leaving a small border where the tape is. I cut some 1" painter's tape in half to create these strips, which is a pain, but I found it works for me.

I'd recommend putting something between your painting and your painting surface, keeping in mind that the tape doesn't stick to some surfaces, or could damage others, along with any runoff paint. Use your discretion. (I bought the cheeseboard solely for this purpose.)

IMG_5740_Step1.jpg

Next I saturated the entire paper with water, using my brush, even getting my face nice and close to make sure there aren't dry spots because I cannot tell otherwise.

Using a brush, I dropped droplets of color onto my paper. (You don't have to actually wait for it to drip, you can tap the paper with your brush.) You can see the bleed and how each color spreads out in the picture below, which is what you're looking for to make sure your paper is wet enough. There's a photo example later of what happens when there's not enough water on the paper.

Make sure to rinse your brush clean with water before dipping it in the next color.

IMG_5744_Step2.jpg

Once you've got your colors where you want them, take a clean brush and start swishing the colors around on the page. You can blend them over one another, around each other, whatever you feel like. Or try adding one color at a time, blending them in different areas, and see if you like that approach better.

As you're creating, you can also add more color to saturate it in certain parts, or drop clean water on top and watch it run throughout the paint. The cool thing with this is you don't necessarily have to layer darker colors over light, once you tap the brush down to the paper, whatever's newest seems to just push the rest of the color out of the way.

If there's too much water and you notice it dripping off the edges, gently sop it up with a paper towel. You can even blot the paper directly to create some different effects.

IMG_5745_Step3.jpg

At this point, I felt a little unenthusiastic about my color choices, so I decided to add in some pink. In this next picture you can see those darker pink spots, those were areas where I didn't add more water to the page before adding the color. It's not wrong, there is no wrong in this, it just won't blend completely in the end.

Like I said, trial and error.

IMG_5746_Step4A.jpg

You can create these with any colors you want, any saturation level you want, and at any size you want. I've discovered they make perfect backdrops for lettering or embossing, two other things I'm currently learning and practicing as well.

IMG_5750_Step5.jpg

And, to get the full galaxy effect, I decorated some of my other experiments with stars once they dried. (You can use a white gel pen, I'd recommend Uniball or Gelly Roll, both available at Michaels, but here's a fun test they ran at Jet Pens of more brands.)

As you can see, there are endless possibilities for color combos.

IMG_5749_Step6.jpg

Just one more thing to keep in mind, if you're making this and intending to frame it, is to measure your display area before painting. The background can be partially cut off by a matte without issue, but you wouldn't want your lettering or an image to be! An easy way to keep the border in tact is to tape it off there, instead of the small edge like I did. If you quarter a large sheet of paper, you'll get four pieces measuring 5.5" x 7.5," which is slightly too big for a 5"x7" frame, or even a 5"x7" matte. Just bear that in mind.

Thanks for reading, and I hope you were inspired to try something new today.

Did you test this out? I'd love to see what you came up with! Feel free to tag me on Instagram at @JessieMakesStuff or let me know in the comments.


tags: watercolor, galaxy, diy, how to, painting, stars, activity, create
categories: blog, DIY, painting, how to
Tuesday 06.19.18
Posted by Jessica Parker
 

Hello!

Hi there, and thanks for checking out Jessie Makes Stuff!

My name is Jessie, and I have always been interested in arts and crafts. From the time I was little, I remember making gifts for my family, evolving from things like my first pop-up greeting cards  in second grade, through lanyards, painting, friendship bracelets, and pretty much anything else I could learn. My interest in art hasn't changed, though it has evolved over the years. In addition to painting and photography, I'm crocheting a bit these days and learning to do calligraphy, and I'm excited to share with you some past projects as well as new ones I plan to undertake. (If you're interested, I also used to run a baking blog, My Baking Empire, back when I used to bake a lot, so feel free to check that out if you're ever on the hunt for new recipes. I don't intend to keep updating it, but there's at least 5 years' worth of entries on there for you!) 

Lots of exciting changes are going on here at the Jessie Makes Stuff website, like my online shop coming soon!, and I thought this blog would be another welcome forum where I intend to post regularly about projects I'm working on, how-to's on previous things I've made, profiles on inspirational artists I enjoy, and possibly some product recommendations for things I've enjoyed using.

So thank you for joining me on this journey, and I hope we have the chance to grow together and make some fun stuff!

To get us started, I thought I'd show you the ideas notebook I created for myself. I wanted one, personalized place where I could write down all my thoughts and ideas for everything from art projects to stories I may want to write. (Quite a few family members have since received journals like this as gifts.) 

This is a simple project that would be fun not only for you to make for yourself, but as an afternoon activity with friends (or even for kids). Just ask everyone to bring a few sheets of stickers and their own notebook to decorate. (I got this notebook at Target years ago, and I've seen similar ones with pineapple and zebra patterns on it. They also sell good quality, $5 notebooks at Michaels, not that I spend half my life there or anything.)

There are no rules, just decorate with some of your favorite things (maybe dinosaurs, flowers, or cupcakes), but I do recommend adding some 3D embellishments for some depth. I haven't tried this with any textured notebooks, like Moleskine, so you'd have to do your own test and see if the stickers stay. Fun fact, these pictures were taken 4 years ago, and I've noticed that only one of the stickers has fallen off!

Let me know if you try this, and please follow and tag @JessieMakesStuff on Instagram if you post your creations. I'd love to see them!

IMG_0675.jpg
IMG_0678.jpg
tags: crafts, decoration, journal, personalized, activity, create, custom, gift ideas
categories: crafts, decoration, blog
Thursday 05.31.18
Posted by Jessica Parker
 

All images, including logo, are property of Jessie Makes Stuff, and not to be used anywhere without prior expressed written permission.